
Freezer Door Seal Damaged? Here's Exactly How We Diagnosed and Fixed One in Chicago
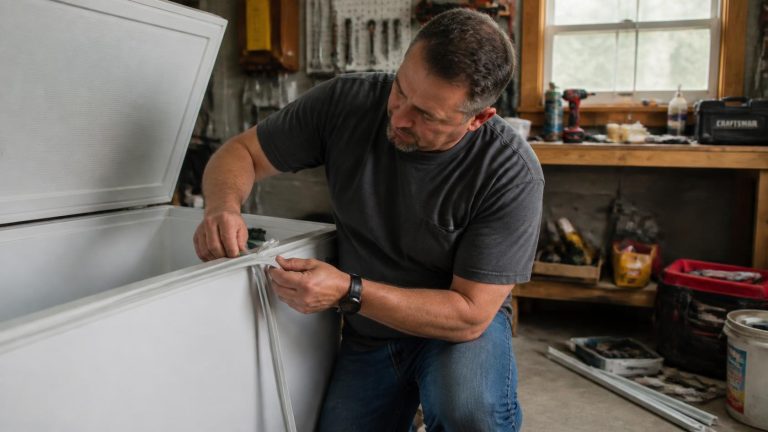
A step-by-step look at a real refrigerator repair, from a worn freezer gasket to a tight, energy-efficient seal
On a combo refrigerator-freezer, it’s easy to assume both doors are sealing fine if one of them clearly is. In this case, the refrigerator side sealed perfectly while the freezer side had quietly been letting warm air in for weeks.
The first signs were small: frost forming along the edges of the freezer door, and a freezer that ran longer and more often than it used to. Both point to the same thing. When warm, humid air slips past a worn gasket, the moisture freezes right at the gap, and the freezer has to work harder to pull its temperature back down.
Here is the exact diagnostic process our certified technicians used to confirm the freezer gasket specifically, fix it in a single visit as part of our freezer repair service, and stop the extra strain on the compressor. Want to check your own freezer first? Our step-by-step freezer seal check shows you how.
Case Snapshot
The Problem
One Door Sealing Fine, One Quietly Failing
Frost had started building up specifically around the edges of the freezer door, and the freezer seemed to be running longer and more often than it used to. The refrigerator compartment above it was working exactly as expected, which made it clear the issue was isolated to the freezer door specifically rather than something affecting the whole unit. Freezer door seal issues can come from a few different places (a worn or cracked gasket no longer compressing properly, a misaligned door no longer sitting flush, a bent door frame, or debris preventing a full seal), so confirming exactly what was letting air in mattered more than replacing the gasket on assumption alone.
The Diagnostic Process
Five Checks, In Order
Our certified technicians follow the same sequence on every freezer door seal call, because confirming exactly where the seal is failing prevents replacing a gasket that wasn’t actually the problem.
Perform a visual inspection of the freezer door gasket
The gasket was checked around its full perimeter for visible cracking, flattening, or separation from the door.
Result: Sections visibly cracked and no longer pliableRun the dollar bill test at multiple points around the door
A bill placed in the door and closed should resist being pulled out if the seal is tight.
Result: Slid out easily at several points, confirming an inconsistent sealCheck the freezer door alignment and hinges
Checked to rule out a misaligned door as a contributing factor independent of gasket condition.
Result: Hanging and closing correctlyInspect the door frame for warping or damage
Checked to rule out a bent frame preventing full contact even with a healthy gasket.
Result: Straight and undamagedConfirm the refrigerator door seal was unaffected
Verified as a final step, since the two doors operate independently on this model.
Result: Intact and sealing properlyThe Root Cause: A Worn, Cracked Freezer Door Gasket
The freezer door gasket had cracked and lost its pliability in multiple sections, most likely from age and years of repeated door use, and was no longer compressing evenly against the door frame when closed. This let warm, humid air into the freezer continuously, which explained both the frost buildup near the door edges and the freezer running longer cycles to compensate for the constant heat gain. The refrigerator door's separate gasket was in good condition, which is why only the freezer side was affected.
The Fix & The Result
Fixed by Replacing the Freezer Door Gasket
The technician replaced the freezer door gasket, confirmed a tight seal around the full perimeter with the dollar bill test, and monitored freezer cycle behavior to confirm run times returned to normal before completing the visit.
Checking the cycle times mattered as much as the new gasket. A freezer that had been fighting a leak for weeks needed to show it could hold its temperature without running longer than normal, so the visit didn’t end until that was confirmed.
As with every freezer repair we handle, the price was quoted before any work started. Every repair is backed by a warranty, and coverage terms depend on your appliance brand.
The freezer door now seals tightly with no gaps, and cycle times have returned to normal. This is the outcome we aim for on every freezer door seal call: confirm the seal issue is isolated to the actual problem door and gasket, since combo units can have one door fail while the other stays completely fine.
If your own freezer has been letting air in for a while, make sure it’s back to holding 0°F. The USDA recommends keeping an appliance thermometer in your freezer to check the temperature, and notes that freezer burn affects food quality, not safety.
Beyond This Case
Common Causes of a Freezer Door Seal Damaged
Not every case matches this one. Here are the most common reasons a freezer door seal fails, from easiest to most involved.
| Cause | How Common | DIY Fixable? |
|---|---|---|
| Worn or cracked gasket losing its seal | Very common | Yes, gaskets are often user-replaceable |
| Food debris or spills preventing a full seal | Common | Yes |
| Door misaligned or not closing flush | Common | Sometimes, minor adjustments possible |
| Gasket pulling away from the door at one or more points | Common | Sometimes, if reattachable |
| Bent or warped door frame | Less common | No |
| Damaged hinge affecting door closure | Less common | No |
Brand-Specific Notes
This Happens Across All Major Brands
Prevention
Catch a Weakening Seal Before It Fails
- Periodically run the dollar bill test around the freezer door to catch a weakening seal early
- Wipe down the gasket regularly to prevent food debris or spills from affecting the seal
- Avoid slamming the freezer door, which can accelerate gasket wear over time
- Address visible cracking or stiffness in the gasket before it fully fails
- Keep the freezer door closed as much as practical, since repeated opening stresses the seal
Before You Call
DIY vs. Calling a Professional
Reasonable to try yourself
Running the dollar bill test and visually checking the gasket for obvious cracks or debris are reasonable first steps a homeowner can try.
Call a certified technician
If a gasket replacement is needed, correctly sizing and fitting a new gasket for a tight seal is where calling a certified technician avoids a repeat failure from an improperly installed part.
Not sure if it's the gasket or the door itself? Book online and we'll confirm the cause and quote the price before any work starts. Prefer to ask first? Send us your question.
Freezer Door Seal Damaged?
Get It Diagnosed the Right Way, the First Time
Same-day and next-day appointments available across Chicago and the surrounding suburbs. $89 diagnostic fee, waived with repair. 10% off your first repair.
FAQ
Freezer Door Seal Damaged: Common Questions
Answers to the questions we hear most on freezer door seal calls in Chicago.
Why is only my freezer door sealing poorly if the refrigerator door is fine?
On a combo refrigerator, each door has its own gasket, hinges, and pattern of use, so the two seals wear at different rates. One can crack or lose its flexibility while the other still seals perfectly. In this case, the freezer gasket had cracked from age and repeated use, while the refrigerator gasket was still in good condition.
Can I replace the freezer door gasket myself?
On some models, yes. Many freezer gaskets press into a groove around the door and can be swapped with patience and the exact part for your model number. Screw-mounted and foamed-in-place gaskets are more involved, and a gasket that isn't seated evenly can leave the same gaps you started with. If you'd rather get it right the first time, our certified appliance technicians can handle it.
How much does it cost to diagnose a freezer door seal issue?
Our diagnostic fee is $89, and it's waived when you book the repair. If the gasket needs replacing, we quote the full price before any work starts. Most of our repairs fall between $129 and $400, and your exact price depends on the issue and the part your model needs.
How do I know if my freezer door seal is actually the problem?
Common signs include frost forming along the edges of the freezer door, a freezer that runs longer or more often than it used to, and a gasket with visible cracks or stiff spots. A dollar bill that slides out easily at any point around the closed door confirms the leak. If frost is spread across the back wall or coils instead, the defrost system is a more likely cause.
Can a bad door seal increase my energy bill?
It can. A worn seal lets warm, humid air into the freezer continuously, so the compressor runs longer and more often to hold the temperature. That extra run time uses more electricity. Replacing a failing gasket early is the simplest way to stop the extra cost and the strain on the compressor.
How long do freezer door gaskets usually last?
There's no fixed lifespan. Gaskets wear with age, how often the door is opened, and how well they're kept clean. Replace one when it cracks, hardens, loses its shape, or fails the dollar bill test. Checking the seal periodically helps you catch wear before it causes frost or longer run times.
Will cleaning the gasket fix a seal that's already failing?
It depends on why it's failing. If food residue or spills are keeping the gasket from sitting flat, a wipe with warm water and mild soap can restore the seal. If the gasket is cracked, stiff, or has lost its shape, cleaning won't fix it. Clean it, dry it fully, and retest with a dollar bill to see which situation you have.
Do all refrigerator brands have the same gasket wear issues?
Gasket wear happens on every brand, because gaskets are wear parts that age with use. What differs is how the gasket mounts to the door, whether it presses into a groove, is held by screws, or is foamed in place, and which exact part fits your model. That's why we match the replacement gasket to your model number.