A worn refrigerator door seal is one of those problems that hides in plain sight. The fridge still runs, the light still comes on, and nothing looks obviously broken, but warm air is sneaking in every time the seal fails to hold, and cold air is sneaking out right along with it. Refrigerator door seal repair usually gets put off because the fridge still technically works, and it rarely gets treated as urgent as refrigerator repair for a fridge that’s stopped cooling outright. It just works harder than it should, and it comes with two risks most people don’t connect to a gasket: food safety and mold.
A gap in the seal lets the temperature inside the fridge drift, and that drift matters more than it sounds like it should. It also means warm, moist kitchen air is condensing somewhere it shouldn’t, which is exactly the kind of situation the EPA warns leads to mold growth if it isn’t caught. Neither of those is a reason to panic, but both are reasons to actually test your seal instead of guessing.
Here’s the dollar-bill test to check your seal in under a minute, what the food safety and mold risks actually look like, and how to tell whether refrigerator door seal repair means a low-cost gasket swap, a full replacement, or a call for refrigerator repair.
Table of Contents
- The Dollar-Bill Test: Check Your Seal in Under a Minute
- Why a Failing Seal Raises Your Energy Bill
- The Food Safety Risk of a Bad Door Seal
- The Mold Risk Nobody Talks About
- When Refrigerator Door Seal Repair Is Enough
- When You Need a Full Seal Replacement
- Brand-Specific Notes
- Prevention Checklist
- FAQ
The Dollar-Bill Test: Check Your Seal in Under a Minute
This is the fastest way to check a refrigerator door seal without any tools:
- Open the fridge door and place a dollar bill so it hangs halfway in and halfway out, right where the seal would close over it.
- Close the door on the bill.
- Pull the bill out slowly.
If the bill slides out with little to no resistance, the seal isn’t gripping the way it should. If you feel real resistance, or the bill tears before it slips free, the seal is holding fine at that spot. Repeat this at several points around the door, especially the corners and the bottom edge, since seals often fail unevenly rather than all at once.
Why a Failing Seal Raises Your Energy Bill
Every gap in the seal is a small, constant air leak. Warm air from the kitchen creeps in, the compressor kicks on to counteract it, and that cycle repeats far more often than it would with an intact seal. The compressor ends up running longer and more frequently just to hold the same temperature, and that shows up directly on your energy bill. It’s the same underlying strain that dirty condenser coils cause, just from a different source, and it’s part of why appliance repair calls for “running constantly” often trace back to something as simple as a worn gasket. A fridge fighting a bad seal and dusty coils at the same time is working considerably harder than it needs to.
The Food Safety Risk of a Bad Door Seal
This is the part that gets overlooked most. USDA food safety guidance identifies 40°F to 140°F as the “danger zone,” the range where bacteria multiply fastest, in some cases doubling in as little as 20 minutes. A refrigerator is supposed to stay at or below 40°F specifically to keep food out of that range.
A worn seal that lets warm air in can push the interior temperature up close to that threshold, especially in a fully loaded fridge or during a hot Chicago summer when the kitchen itself runs warmer. You won’t necessarily see or smell a problem. Food can look and taste normal while still sitting in temperatures that allow bacteria to grow. If your fridge has been running warmer than usual, it’s worth checking the actual temperature with an appliance thermometer rather than trusting how the food looks.
The Mold Risk Nobody Talks About
A failing door seal doesn’t just let warm air in. It also lets the condensation that forms around the door frame and gasket track linger and collect instead of staying sealed off. According to EPA guidance on mold prevention, damp areas need to dry out within 24 to 48 hours to keep mold from establishing itself, and indoor humidity should stay below 60 percent, ideally between 30 and 50 percent. A gasket that’s cracked, torn, or no longer sealing tight creates a small pocket of trapped moisture right at the door frame that can sit wet far longer than that window, particularly in humid Chicago summers.
Mold around a refrigerator door isn’t just cosmetic. It’s the kind of hidden, recurring moisture problem the EPA specifically flags as a mold risk, and it tends to come back after cleaning if the actual seal failure causing it never gets fixed.
When Refrigerator Door Seal Repair Is Enough
Not every seal problem requires a full replacement. Refrigerator door seal repair is usually enough when:
- The seal has come loose from the door channel but isn’t cracked or torn
- There’s a buildup of food residue or grime keeping the seal from closing fully, and a cleaning restores the seal
- Only one section of the seal fails the dollar-bill test, and the rest of the gasket is intact and flexible
In these cases, reseating the gasket or giving it a thorough cleaning can solve the problem without buying a new part.
When You Need a Full Seal Replacement
A full gasket replacement is the right call when:
- The seal fails the dollar-bill test at multiple points around the door
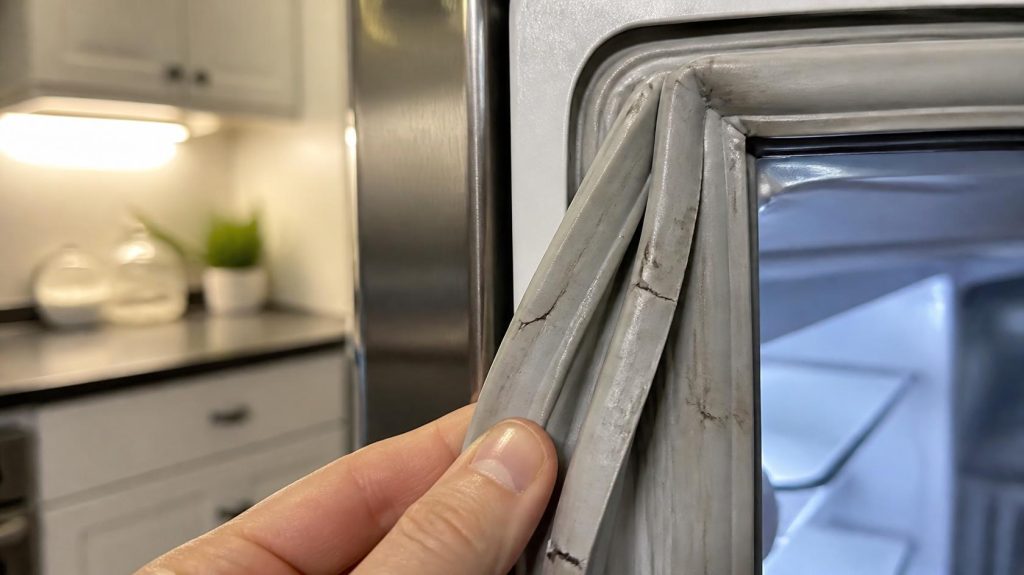
- You can see visible cracking, tearing, or stiffness in the rubber
- The seal has lost its shape and no longer sits flush against the door frame
- You’ve already cleaned and reseated it and it’s still failing the test
A seal that’s failed at multiple points is one of the more common reasons we end up ordering a replacement gasket instead of just cleaning one. Refrigerator door seal repair at this stage usually means ordering a gasket that matches your exact model, since seals aren’t universal across brands or even across model years within the same brand.
Brand-Specific Notes
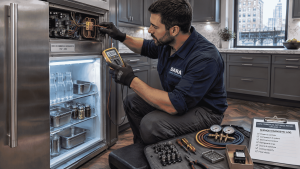
Gasket shape, mounting style, and part numbers vary significantly by brand and model, including on higher-end lines like Sub-Zero and Thermador. Some manufacturers use a snap-in gasket that a homeowner can reasonably replace, while others use a screw-mounted retainer strip that’s more involved to remove and reseat correctly. Our certified appliance technicians with experience across major and luxury refrigerator brands can identify the correct part and handle the appliance repair if you’d rather not deal with sourcing the exact gasket yourself.
Prevention Checklist
- Run the dollar-bill test every few months, especially at the corners and bottom edge
- Wipe down the seal regularly to keep food residue and grime from breaking the seal’s grip
- Keep an appliance thermometer in the fridge so you catch temperature drift before it becomes a food safety issue
- Address a failing seal right away rather than waiting, since both the energy loss and the mold risk compound the longer it goes unfixed
FAQ
How do I test my refrigerator door seal without buying anything?
Close the fridge door on a dollar bill so it hangs half in and half out. If you can pull it free with little resistance, the seal isn’t gripping properly at that spot. Test several points around the door, especially the corners and bottom edge.
Can a bad door seal really affect food safety?
Yes. The USDA identifies 40°F to 140°F as the danger zone where bacteria multiply fastest. A worn seal that lets warm air in can push your fridge’s interior temperature toward that range without any visible sign in the food itself, so it’s worth checking with an appliance thermometer if the seal fails the dollar-bill test.
Can a refrigerator door seal actually cause mold?
A failing seal can trap condensation around the door frame and gasket track longer than the 24 to 48 hour window the EPA identifies as the threshold for mold growth. It’s not the seal itself growing mold, it’s the trapped moisture the gap allows that creates the risk.
Should I repair or replace my refrigerator door seal?
A repair or reseating is usually enough if the gasket is intact but loose or dirty. Full replacement makes more sense if the seal fails the dollar-bill test in multiple spots, shows visible cracking or stiffness, or has lost its shape and no longer sits flush against the frame.
How much does refrigerator door seal repair cost?
A cleaning or reseating typically costs nothing beyond your time. A full gasket replacement varies by brand and model since seals aren’t universal, so it’s worth getting a quote for the exact part your refrigerator needs.
Why is my refrigerator door seal not sticking anymore?
Food residue, grease, and general grime buildup are common culprits and often respond to a thorough cleaning. If cleaning doesn’t restore the seal’s grip, the rubber itself has likely lost its flexibility and needs replacing.
Can I clean a refrigerator door seal instead of replacing it?
Yes, and it’s worth trying first. Wipe the seal down with warm water and mild soap, working into the folds where grime collects, then dry it fully and retest with the dollar-bill method before assuming you need a replacement.
Does a bad door seal affect my energy bill?
Yes. A gap in the seal lets warm air in continuously, so the compressor runs longer and more often to hold temperature. That extra run time shows up as a real, if usually modest, increase in your energy bill.
Don’t Let a Small Seal Problem Become a Bigger One
Refrigerator door seal repair is a small fix that prevents three separate problems at once: a higher energy bill, food sitting in an unsafe temperature range, and moisture that can turn into mold around your door frame. If the dollar-bill test tells you something’s off and you’re not sure whether it’s a repair or a replacement, our certified appliance technicians provide fast, affordable refrigerator repair and appliance repair throughout Chicago and the North Shore. Book a diagnostic or contact us and we’ll take it from there.